Make Your Own Kinetic Sculpture Inspired by Alexander Calder
Step 1: Meet Alexander

Self-portrait, Alexander Calder, 1968 (Calder Foundation, NYC)
Alexander Calder is probably best known for his playful mobiles and other kinetic sculptures. Calder’s mobiles have one or more moving parts that are carefully balanced so they can move freely.
Calder’s sculptures can be seen all over the world, but the reason we chose him as inspiration for a stay-at-home project is because he often made art out of things he found around the house or on the street, such as yarn, fabric, recycled cans, and scraps of metal or wood. He often worked with very simple tools or no tools at all. In fact, he made many sculptures out of nothing but some wire using just his bare hands.
Step 2: What you’ll need
Don’t be too fussy about materials.
If you don’t have one or more of the items listed in the directions below, don’t sweat it. Look around the house for a reasonable substitute. For example, if you don’t have coat hangers, try pipe cleaners, drinking straws, wooden chopsticks, or pencils or pens. What else might you use?

The directions below will show you how to make a mobile with four vanes. You can modify the design however you like. Younger kids may need help from an adult.

You will need wire coat hangers and some sort of stiff cardboard. We used 6-ply railroad board, but oak tag, cardboard from cereal boxes or postcards could work.

You will need a pair of scissors, a wire cutter and a pair of pliers. Needle-nose pliers make nice round curves, but regular pliers will do the trick.

You will need a pencil to sketch out the shapes and something to color your cardboard, such as makers, crayons, oil pastels or colored pencils. This step is optional, especially if you have colored cardboard.

You will need twine, ribbon, fishing line or string.
Step 3: Make the Wire Framework

1.

3.

3.
1. Use the wire cutter to snip off the coat hanger hook.
NOTE 1: This is one step where having the right tool makes all the difference. If you don’t already have one, borrow a good pair of wire cutters or buy one for about $10.00. The wire cutter should cut through the coat hanger with ease. If you don’t have any tools, consider using a different material, such as pipe cleaners or paper straws.
NOTE 2: Younger artists should ask an adult for help!
2. Bend the wire to a good length for the main arm. (It should be about 18 to 30 inches).
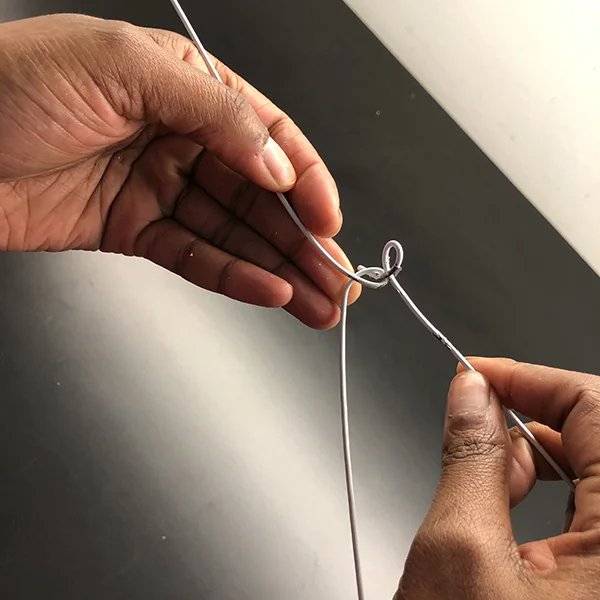
3. Create a loop in the center of wire. You can bend the wire by hand or use needle nose pliers.

4.

4.

5.
4. Create loops at each end of the main arm to hold smaller arms. A needle nose plier is perfect for this, but a regular pair of pliers will do. Leave a gap in these loops about the diameter of the wire so you can easily slip on your smaller arms.
5. Trim the ends of the loop with the wire cutter if necessary.
6 - 7.

9.
8.
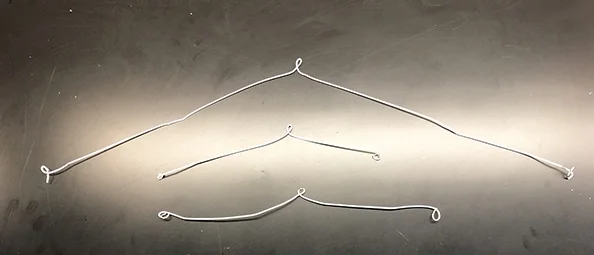
6. Create 2 smaller arms, each about half the size of the large arm.
7. Repeat steps 3 — 5 above for the two smaller arms.
8. Slip the center loops of the smaller arms into the end loops of the big arm.
9. You should now have a basic "H" shape.
Step 4: Make and Attach the Shapes

10.

11.

12.
10. Using a pencil, lightly draw a closed shape on a piece of cardboard.
11. Color the shape on both sides of the cardboard. (Optional)
12. Cut the shape out.

13.

14.

15.
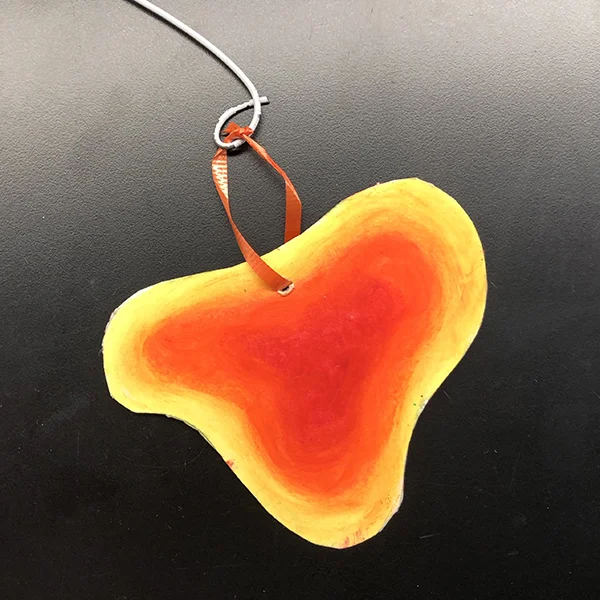
13. Poke a hole near the top of each shape with a scissor blade, a knife, or use a hole punch.
14. Thread a 4-inch piece of ribbon, thread, yarn or twine through each shape and tie it into a loop.
15. Repeat steps 10 — 14 until you have four shapes with ribbons or strings attached.
Step 5: Assemble and hang your mobile
16.

18.
NOTE: This is another step where younger artists might want to ask for help from and adult.
16. Attach the cardboard shapes by looping the ribbon or yarn around the end loop of each short arm.
17. You will probably need to adjust the balance of your mobile to make it hang properly. If one side is too heavy, try hanging an additional cardboard piece from the lighter side. If your mobile is really off balance, you may need to make adjustments to the wire arms. You could try trimming an arm on the long side, or make a new loop closer to the center of balance.
18. Tie a loop of ribbon or yarn to the center loop of the long arm and then suspend the mobile from a ceiling hook, nail or push pin.
STEP 6: SHARE YOUR Mobile!

Please share your art with us by attaching it to an email to programs@creativeartworks.org. If you don’t mind, please include your name and age.